Poultry App User Instructions
Limitations
This web application can work offline without continuous internet connection. However, an internet connection must first be established to load the application before the offline mode is accessible. If the user then proceeds to remove the local browser storage it will no longer work offline. Internet connectivity must be re-established for the data to be uploaded to Safe Food.
This web application was developed with the intent of working primarily on a tablet device in modern internet browsers (excluding Internet Explorer) but will also work on a desktop or laptop computer with modern internet browsers. Smaller devices, such as mobile phones, are not recommended. The web application will still operate on smaller screens, but with some UI (user interface) anomalies.
Prerequisites
Users are expected to already be using the Safe Food iOS app. The credentials that users have been previously assigned will be the same credentials used to log in to this web application. The dashboard component of this project will stay the same.
Logging into the Poultry App
Visit https://poultryapp.safefood.mydev.au and click one of the login buttons available.
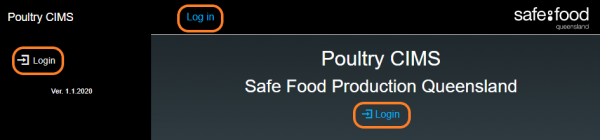
Fill in your login credentials and press ‘Submit’ (same credentials as previous iOS app).

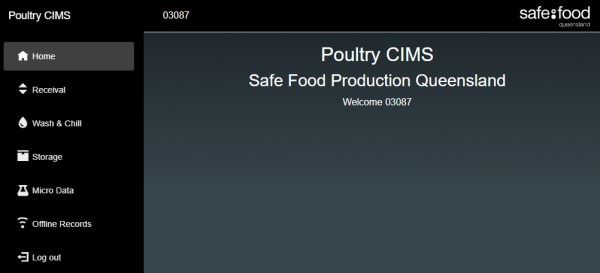
Once you have logged in, you will see this welcome screen.
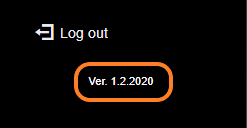
Version
Under the Login/Log out button in the sidebar, you will see what version of the web application you are running.
Uploading data (with internet connection)
You can start entering data by selecting the appropriate tab(s).
Each tab will display the corresponding forms for you to enter the appropriate datapoints. Press ‘Submit’ when you have finished completing a form.
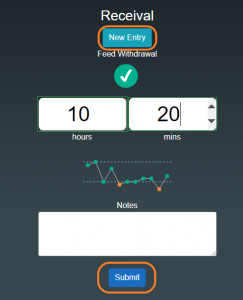
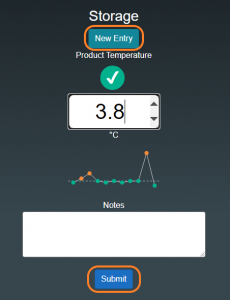

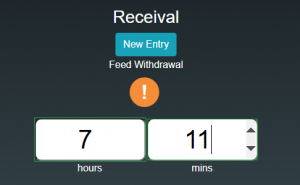
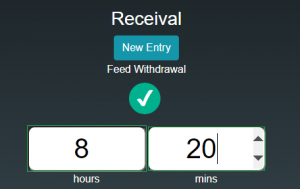
If the data entered is out of spec, an orange ǃ will display, otherwise a green ✔ will appear.
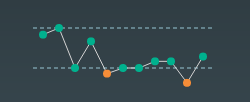
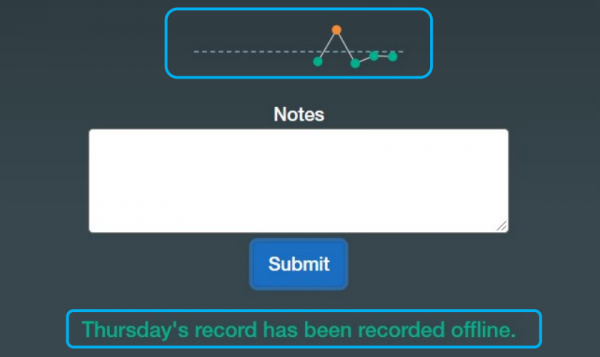
The sparkline will give you a small display of your most recent data entries, with the latest one on the right. Similar to above, the orange dots represent out of specs and the green dots represent within specs. The blue dotted lines represent the cut offs for out of specs entries.
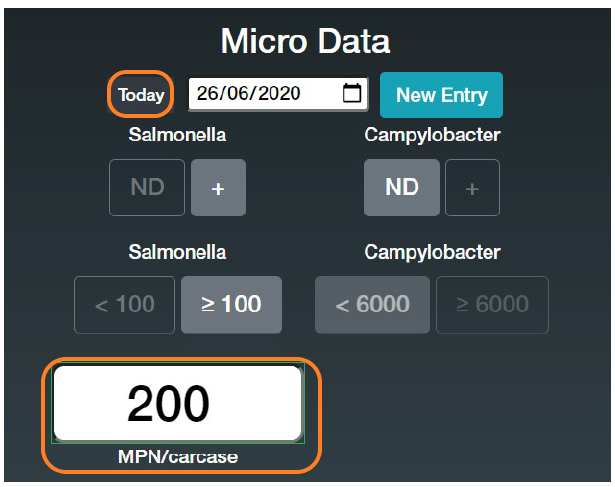
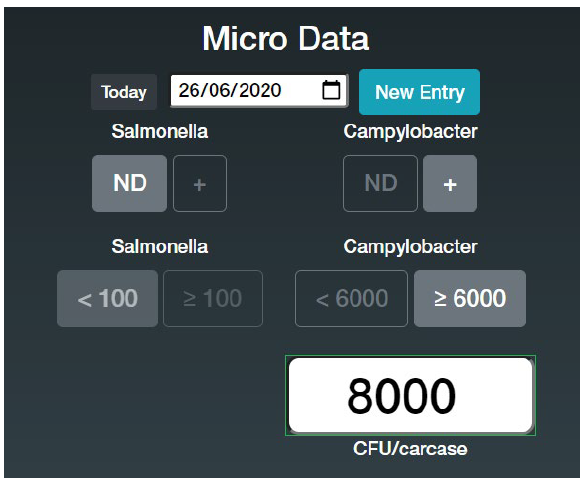
Micro Data
Selecting ND (no detection) will automatically select <100 or <6000 for Salmonella or Campylobacter. It also disables the ability to select ≥100 or ≥6000 for Salmonella or Campylobacter.
Selecting + (positive) will enable you to select both <100, <6000 or ≥100, ≥6000 for Salmonella and Campylobacter.
There is a Today button to reset the calendar if you require.
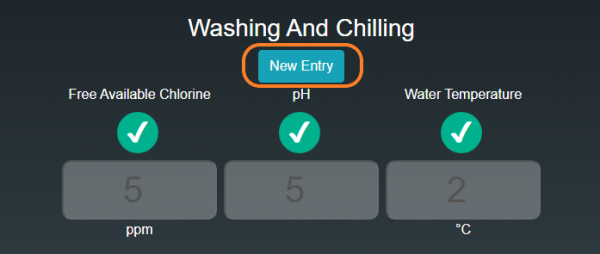
New Entry (second entry)
When attempting to enter a second set of datapoints on the same tab, the text boxes will grey out from the previous entry. You must click the ‘New Entry’ button to enter a second set of data.
Recording data without internet connection
You must first establish internet connectivity before you can access offline mode. Login to the web application while connected to the Internet. From here, you can either leave the webpage open in your browser or start entering data and then leave the page open.
![]()

While leaving the page open in your browser, you can move into a location without internet connectivity. When you do not have internet connection, you can still enter data and go in between each tab. DO NOT PRESS REFRESH, as this will kill the app and not allow you to continue using it until internet connectivity is re-established.
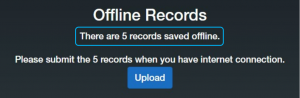
When you submit the data without internet connectivity, a ‘recorded offline’ message will appear. The sparkline will also continue to populate to indicate that data has been recorded if you remain on the same tab, but as soon as you change tabs the sparkline will disappear. Do not be alarmed, data is still being stored locally on your device. For reassurance, you can click on the ‘Offline Records’ tab to see the number of records that have been stored offline.
Uploading offline records
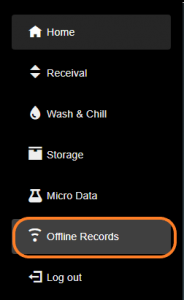
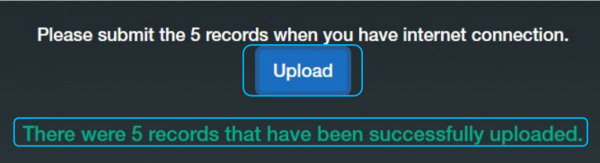
When you are ready to upload your offline records, select the ‘Offline Records’ tab on the left. This tab will display the number of offline records you have stored on your device.

Return to a location where you have internet connectivity once again. Then click ‘Upload’ and the records will get uploaded to the web application.
Note: when you enter a new datapoint but have established internet connectivity without realising, the web application will upload these records for you without having to use the Offline Records tab.